This week has been a fabulous week because I had a new boat arrive – a beautiful shiny Pyranha Scorch! Always an exciting event! But before you can take a new boat out on the water, it is a good idea to outfit it to fit you. This blog is a quick guide to how I outfit a new kayak. I’ve also included some extra tips for outfitting a whitewater kayak as a woman.
1. Sit in it – ideally with gear on!
It sounds so obvious but the first thing you should do when outfitting a new whitewater kayak is sit in it! Ideally whilst wearing whatever you would be wearing on the river. (I put my drysuit on my bottom half). It is useful to wear your river shoes. Have a wriggle and identify where you feel loose. How much room do you have between your feet and the footplate? How much wriggle room do you have around your hips? Are your legs in a comfortable position? Have a wriggle and see how you feel.
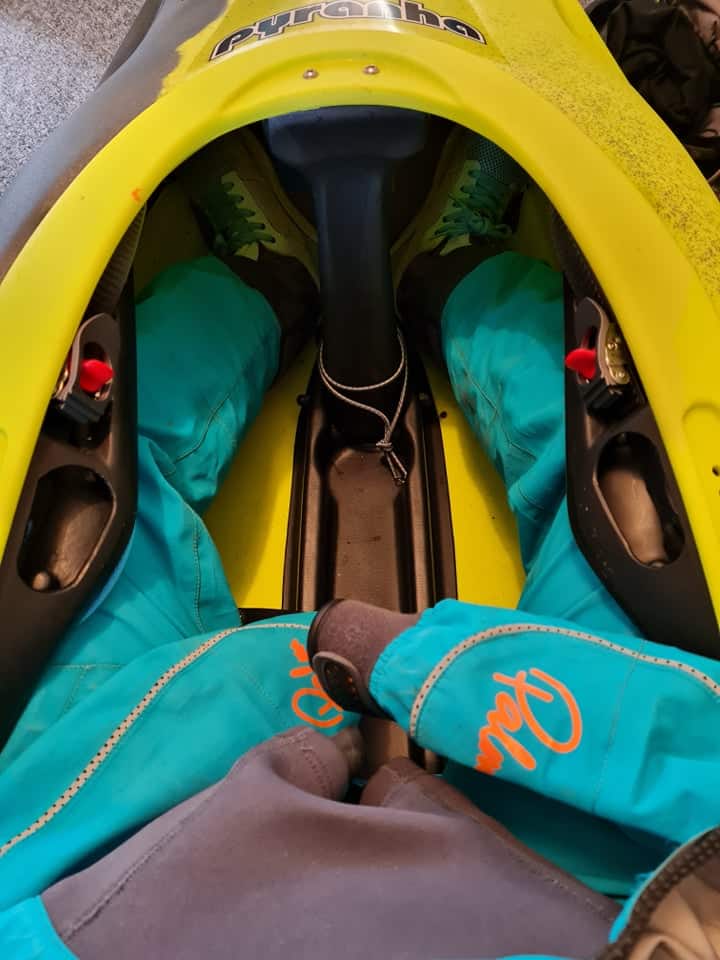
2. Move the footplate & trim the foam block
You want to feel snug in your kayak and the first step to achieving that is to move your footplate. In the scorch, I have an additional foam block which I will be adding to the footplate. I make sure to have added (but not stuck) that in when moving the footplate. It doesn’t have to be a perfect fit yet but it will give you a good idea of how close the footplate needs to be.
Later, after adjusting the hip pads and seat, I will then work on the foam block to make sure it fits the boat properly. This requires a lot of gentle changes and shaving the foam away a bit at a time so that it fits well. You can trim the actual foam block to fit the outline of the boat. Ideally you don’t want any room to get your feet past the foam block. I then added a little heel block to the main foam block. In other boats where there has been a central foam pillar to rest by heels against, I haven’t done this. But in the Scorch, which doesn’t have a foam pillar, it means that my heels will be able to press against something whilst paddling. You want as many points of connection as you can to the boat and this is one way to achieve that.
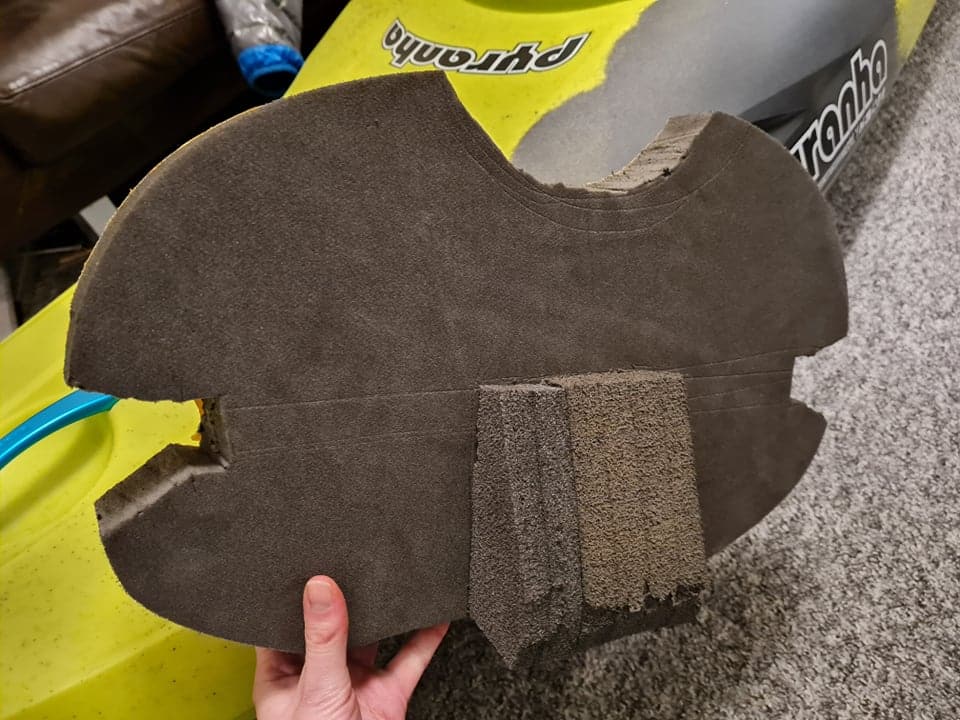
Once the heel block has been glued to the main foam block – I then use the adhesive tape on the main foam block to stick it to the footplate. It is a good idea to have one extra outfitting check before doing this.
Hip pads
Hip pads! The outfitting packs for the kayaks will have lots of little pieces of foam for you to add to the hip pads to make it as tight as you need it to be. I added one extra piece of foam to each hip pad. However in the Summer, when I won’t have so many layers on, I may add more.
This is where my ladies tip comes in. I completely remove the hip pads from boats and turn them on their side so that the raised part of the hip pad is pushing into my hips from the back. Being a lady with curves, I find this fits SO much better than having them in the standard way. It’s not for everyone but I tell people this little trick all the time and so many women (and a few guys) come back and tell me what a difference it has made. It’s incredibly comfortable and it helps me to feel supported.
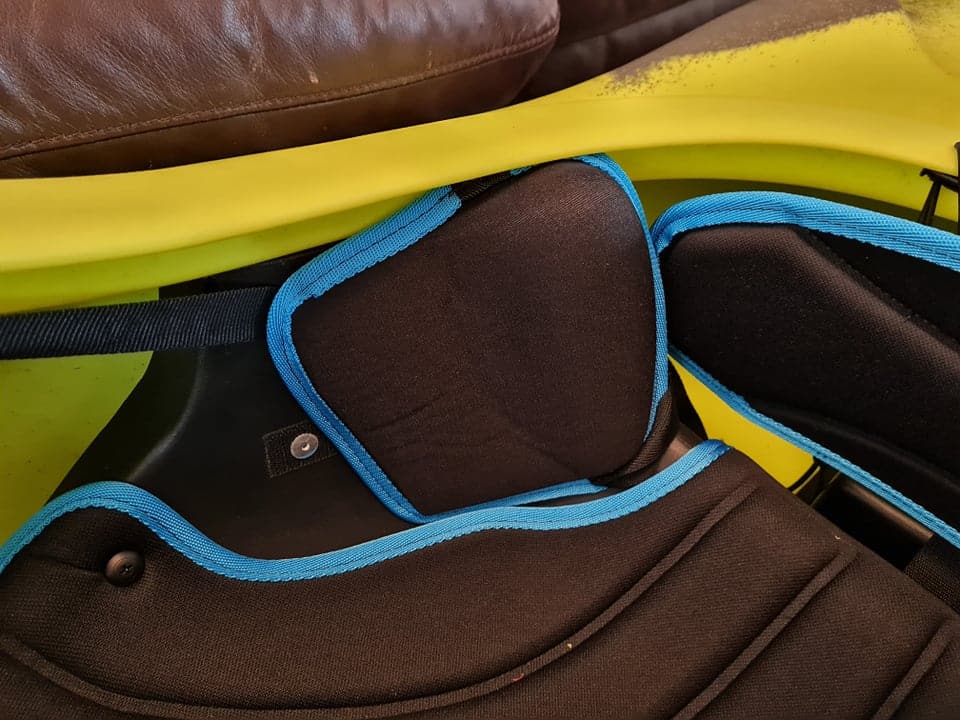
Because doing this means that the hip pads wont be properly strapped in – I then duct tape the hip pads in place. I only do this once I am completely happy with all the other outfitting as it is harder to change their position once you’ve added the tape!
Seat and thigh braces
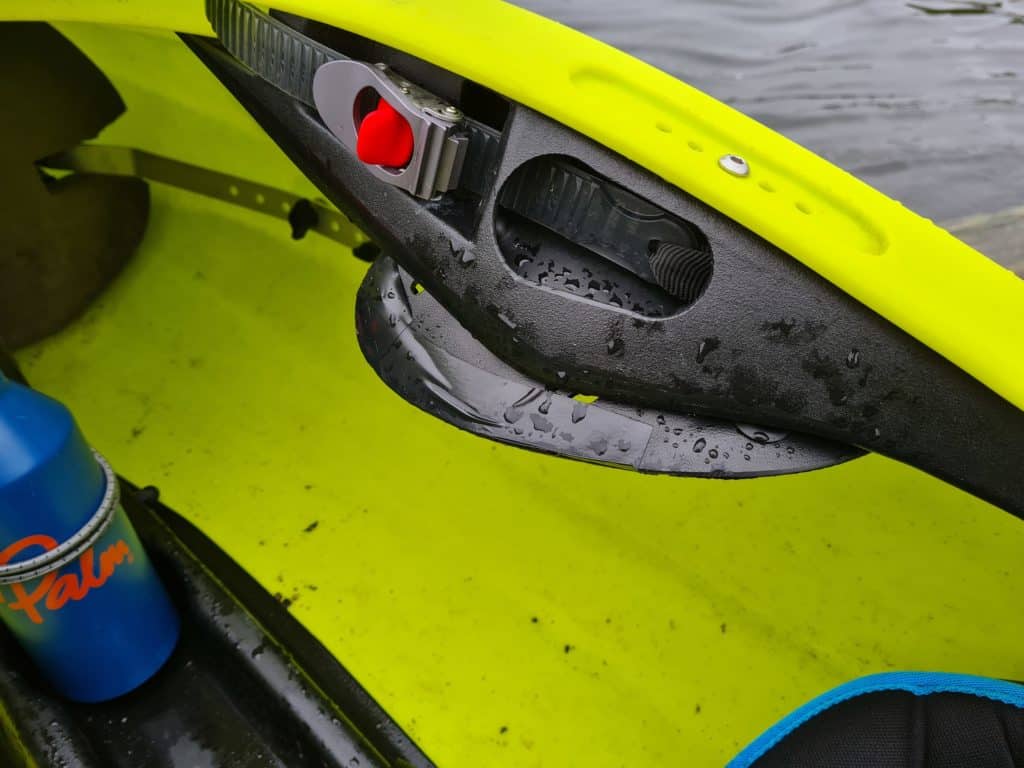
This time around, I haven’t actually adjusted the seat or thigh braces. But it is something that is worth checking. If your legs don’t feel quite comfortable, you can adjust the thigh braces further forward or backwards. It is a bit fiddly as you will have to undo a couple of screws but worth it if it makes you more comfortable.
*Extra edit* After having the Scorch for a few months, I added hookers. Pyranha make hooker attachments which can bolt to the kayaks existing thigh braces which then wrap over your thigh. This makes the thigh braces more aggressive and allows you to feel tighter in the boat. It was the final piece of outfitting I needed to feel really comfortable in the boat as it gave me better edge control which makes manoeuvring the boat easier. I would definitely recommend trying hookers if you are still struggling to ‘click’ with your new boat!
Generally the seats will be quite low in the kayak already when you get them from the manufacturer. This is because the lower you are sat in a kayak, the more stable you will feel and so a lot of people prefer it. However, the higher you are sat in your kayak, the more control you will actually have. If you look at the top end paddlers, they will all have added extra seats to their boats so that they are sat higher.
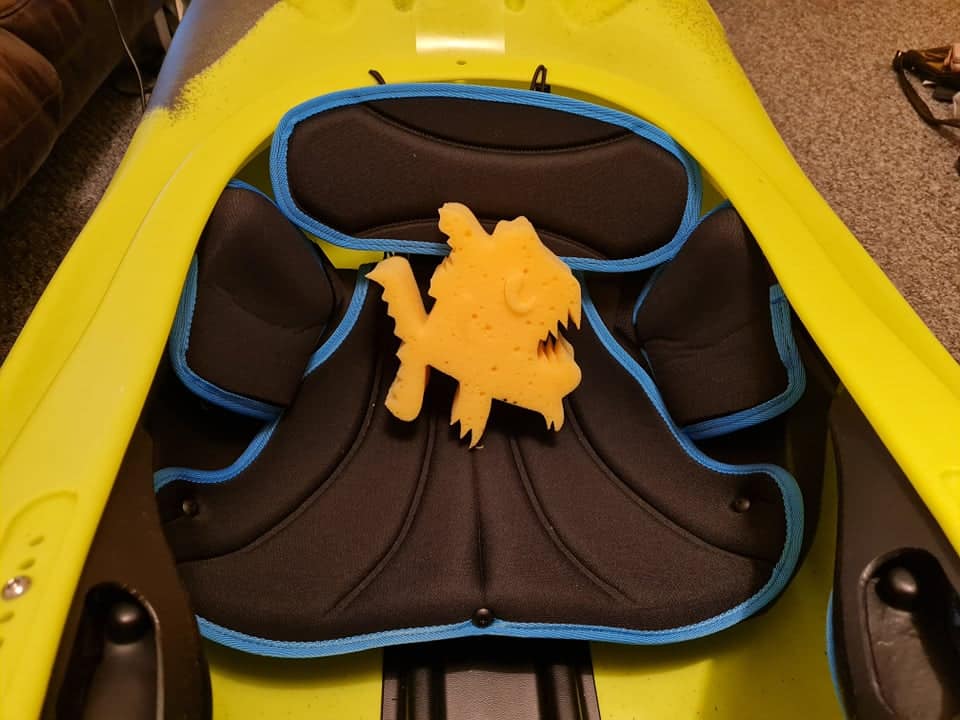
My advice is to give it a go both ways. Try paddling with an extra seat and if you like it – put it in properly. If you don’t – then take it out again! Seat position is a completely personal preference so do what makes you feel most comfortable. I’ve not added any extra seats yet but if I find it feels too low once I’ve actually spent some time on the water, then I will change that.
Airbags + name!
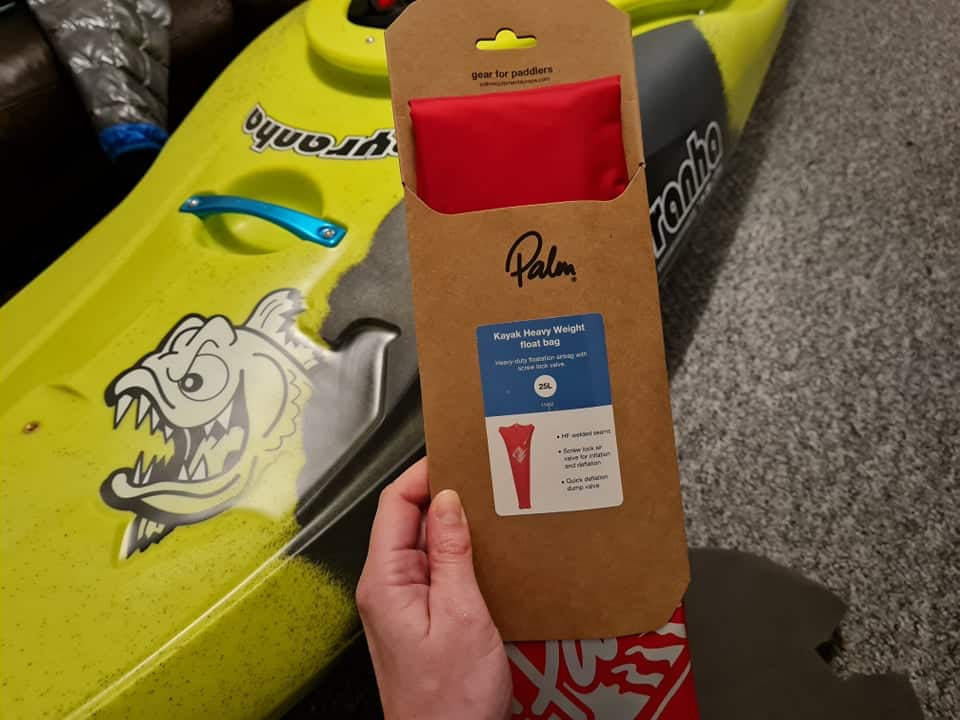
Final thing is to make sure you add an airbag or two and sharpie your name/number inside your whitewater kayak. Nobody aims to swim out their kayak but it is better to give your boat the best opportunity of being recovered as possible if it does happen! I have one airbag in front of my footplate (put in before sticking in the foam block). I also have two airbags in the back of my boat, one of which I deflate if I have a lot of stuff in my dry bag.
Paddle and readjust!
Lastly – outfitting is something that should be flexible. I’ll outfit a whitewater kayak to fit me as best I can. But inevitably once I start paddling I will notice things that could be better. An extra seat or more padding on the hips for example. I change the outfitting to fit me when it needs it. Better to be comfortable!
Now it is outfitted – I better go paddle it! Look out for a new blog on the Scorch coming soon!
16 replies on “Outfitting a new whitewater kayak”
Very helpful thanks
Thank you!
My right hip hurts and leg goes numb after about 45 minutes boating, I don’t feel like my hip pads are to tight but I’m excited to try turning them to the side to see if it helps! I’d like to figure out to make my back brace for better by making it stay higher on my back, do you have any tips?
With the back brace it depends a bit on what kayak it is, but something that is quite common across different manufacturers is having elastic toggles from the back of the cockpit rim to the backband. You can try tightening these which may help. It also helps to do a bit of rearranging once you are sat in the boat – make sure the backband is in the position you want it on your lower back before tightening it up if you use rachets. If you don’t have rachets in your boat maybe look at something like an IR backband.
I enjoyed this so much.
Glad you enjoyed it! Thanks for commenting
Thanks a lot for this post, that’s really helpful!
I have a problem getting the right setup for my new ripper: my feet tend to go completely numb after 15 minutes or so and my hips hurt like hell after a day of paddling. Moving the footrest forward (and the seat more backwards) seem to help a little, but it’s not completely gone. Does anyone know the magic screw I have to turn to make it go away? 🙂
Thanks!
A lot of the times with numb legs the issue comes from hip pads. If you have a pressure point somewhere, it can cause your legs to go numb very quickly.
Hm, I have them in factory position and didn’t notice any pressure coming from them, but I’ll definitely try it tomorrow when I’m back on the water. Thanks a lot for your help!
If you have short legs putting in a set of Hookers or lowering the knee braces with foam can help.
Your hip pads are too tight , try loosening them or raising them up over top of leg 👍🏻
Hi, Is there a correct way to remove the hip pads before rotatng them? I have just got my first boat and the hip pads are definitely in the wrong place. It’s a new issue and I am worried about breaking something before I even get it on the water
Hi! How you remove hip pads etc really depends on the make and model of your boat as kayak manufacturers do it all differently.
[…] some tips to outfit a new kayak, I wrote a blog about it to help guide people which you can read here. I added hookers a little while after the initial outfitting and this was the final change that I […]
Very helpful to understand the specifics of how to adapt a kayak to fit better. Am planning to adapt these ideas to a rec kayak, as it is too loose around me and being short am not getting firm contact on foot pegs.
Glad they helped 🙂